Showing posts with label pumpkins. Show all posts

Wednesday, October 17, 2012

In Love With Fall But NOT Spiders

Some examples of leaves from down at the creek. I love the contrast against the purple bench.

          It happens every year and still I remain in awe of how incredibly brilliant the trees become this time of year. I am a mid-west girl at heart and I guess couldn't imagine God's amazing color display this time of year. Some mornings as I drive into work the trees look as if they have been set ablaze as the sun comes up!
I took this photo on a back road while waiting for a train to pass.

Is it just me or do your tastes change with the seasons? This time of year I'm loving squash,persimmons,caramel apples, and pumpkin roll....well actually pumpkin anything! But it's no wonder since we are totally surrounded with the most amazing yellows,oranges,and crimson reds.


Since I'm talking about all things fall I must confess something else. You see I have a passion for fall leaves, pine cones, but especially acorns. If you walked into either my office or my work room and opened just about any book you will most likely find a few colorful leaves pressed inside.

 I just can't help myself they are just too pretty to walk past. Besides I might just need a few for a project someday. Ha! Ha! yes I'm well aware that is what all hoarders say on that reality TV show!

Who could resist picking this up?!
 I also may be the only women in America who has ever boxed up and moved a (decent size haha) collection of acorns before! More than likely my purse has a few acorns in the bottom of it from a walk to the car and back. I hoard them like a squirrel or..... like just maybe they aren't going to make them anymore. Oh well we all have something we do that makes us unique......don't we!

And one more quick item I want to share with you. I recently saw a quick and easy way to make spiderwebs for your Halloween decor. Our local Ben Franklin shared this on their facebook page and I just had to try it.

 They couldn't be easier. Simply squirt Elmer's Glue on a piece of wax paper in the shape of a web and then sprinkle any color glitter you like over the glue while it's still wet.

Once it completely dries peel it off of the wax paper and voila you have a pose-able web to add to your decor. They are really very glittery the photo doesn't do them justice. The one thing I won't add is a spider!! Nope no spiders in my decor EVER!! I once threw out a brand new National Geographic magazine because it had a spider on the cover.....yep you guessed it I have a few other small quirks to deal with =)

Monday, September 3, 2012

An American Made Weekend

 Hi everybody and Happy Labor Day! I hope you are enjoying this long weekend with family and friends and are staying dry!
First before my mind wanders off....and we all know it will. I wanted to tell you all that I have entered my shop into the Martha Stewart Made in America contest.

On September 7th (my husband's birthday maybe that will bring me luck) is the day the finalists will be announced. You can vote once each day from September 7-24th for your favorite finalist. You can read all about the rules and details here if you would like.
A couple of items I'm thinking of bringing back to my shop.
My signature item in my shop.
 So I am keeping my fingers crossed and probably my eyes as well hoping I make it as one of the finalists. I know I have about as much luck as Frosty does sitting by a campfire but dang it a gal's gotta dream!! Stop here to take a peek at my shop entry...you can even leave me a comment if you'd like. So with a new grand-baby and this contest all on the horizon I am more than on pins and needles. I just love this whole contest idea of honoring and congratulating hard working American small business owners. It really is the backbone of this great country!

For me Labor Day has always been the signal that summer has come to an end. I don't think the old rules still apply...(do they?) but even though I'm still wearing white slacks, capri's and flip flops I am mentally thinking about the fall and all the treats that go along with that word.
A photo from last year. Some of the reds look like fire they were so brilliant!

Fall festivals, comfort food, pumpkins and persimmons. So later this week I will limp down to the basement and start to look for my fall decor. Gosh doesn't the thought of autumn make you feel all warm and cozy,or is it only me? Fall at least for me brings back so many great memories of family and old friends and fattening foods of course.

 I have had five days off and sadly our plans fell apart with hurricane Issac traveling across the Midwest. I think I've shared before how we as a family always come together at Patoka Lake.
From several years ago. We decided to beach the pontoon and take a walk to look for driftwood and shells

The boys were almost too big for this poor tube.
A fun night a few years ago of games and silliness.

It wouldn't have been a total family get together anyway since my youngest son and his wife are expecting their second child any day now, and have been told not to travel very far. Excited isn't the word for it! We are knee deep in the color pink and lavender since we our expecting our first grand-daughter!! We have laughed our selves crazy because we know we have over dosed on girly girl colors, but it's been so much fun.
 So we simply stayed home and did some things we haven't had the time to do. Cleaning should have been one of them but for me it was sewing. I've had so many ideas in my head and never enough quiet time to pull them out. I have almost completed one and hope to have it finished and a pattern put together so I can add it to my shop. I will share it as soon as it is ready.

My youngest grandson has put his seal of approval on this new item. He is so funny and trust me he really does play with my new creations and tells me if it is just dumb (his words haha), and what can I do to make it better.
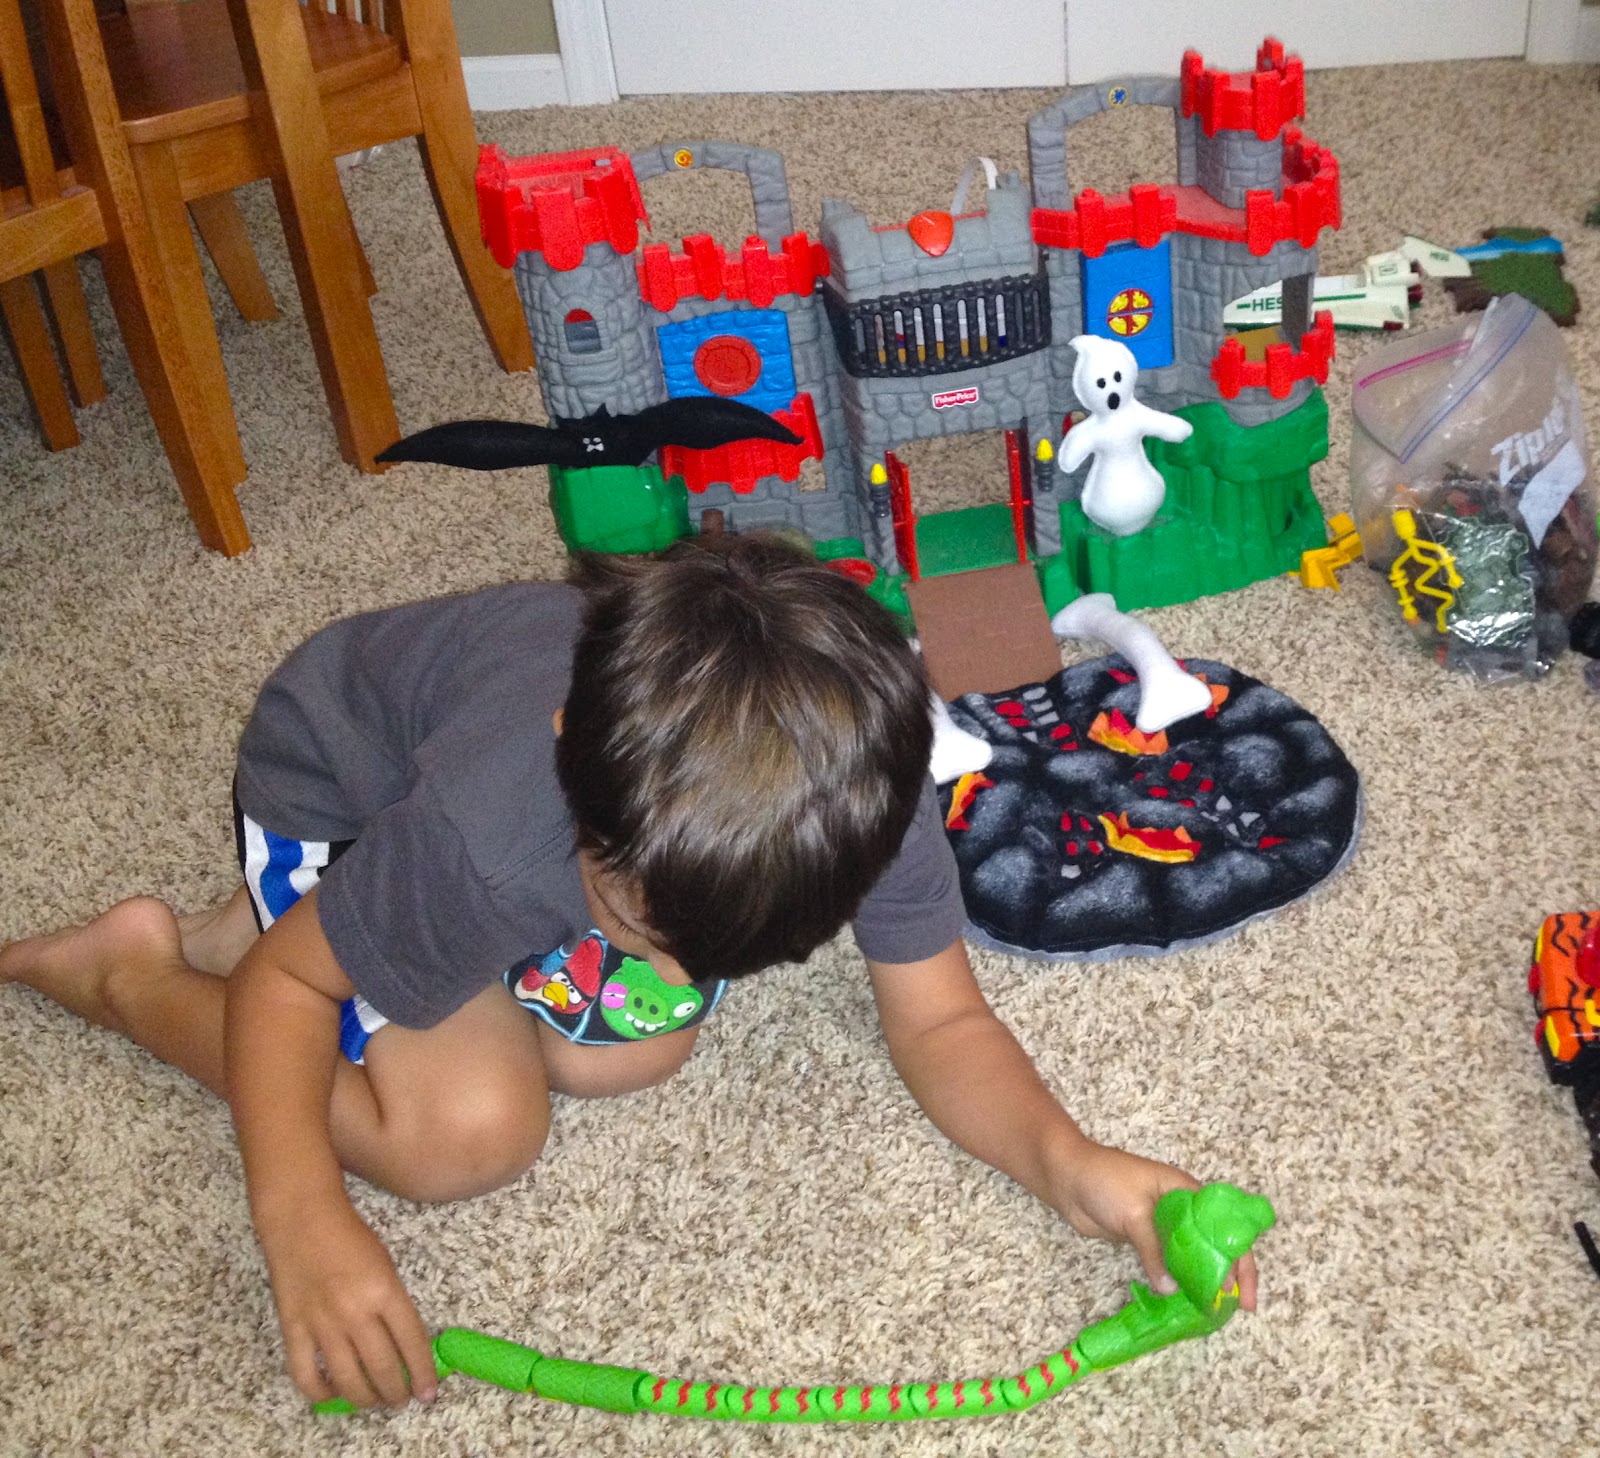
A fire for the castle entrance and some scary bones, bats and ghosts to make it even better,

Recently he stayed with us and I love to work while he plays.....well I should say try and work because he wants my total attention. But for me the best part is when I get to witness his ability to take "his" felt stuffed toys that I've made and use them with his other toys.....that's the blue ribbon for me!
The photo is a little blurry because I didn't want to spoil the moment of our deep conversation on the swing.
 So it's back to my work room for a while.Then after dinner maybe a ride in our 4 wheeler up to the cemetery that's behind our property, just to check on things. I love to ride around and see how things start to change. I'll take my camera of course, you just never know what you may stumble upon.


Sunday, October 16, 2011

Simple Pumpkin Containers

       I finally finished a few pumpkins containers to use as gifts for both Halloween and Thanksgiving. I also have a few new friends who have been so sweet to me this year, and I hope to surprise them. I wanted to share this simple project with you. I have been making these for so long that I have no idea where I first discovered the idea.
I do know one thing for sure it was in the age of B.I. Before Internet!Like my grandson and niece would explain, it was a time of great darkness......... when men and women had only books, magazines,and libraries. We often had to live through great suffering, like snail mail and land line phone calls. Before the light of the great and powerful internet fell across our lands.
Shoot it was even before cable TV and microwaves! You now know that I have been crafting for a very long time!!

Originally they were made much larger with coffee cans. That was the challenge for me because the coffee I buy comes in a bag, not a can. I could be mistaken but I don't think coffee cans are as easy to come by as they use to be.
I knew I wanted to make several so empty washed vegetable cans would have to work. You can make themas small or as large as you want,it is determined by the size of the can you choose.
Here are the items you will need: Clean empty can, cotton fabric, polyfil, felt, a plastic container lid, low temp glue gun,needle and thread.
  Each pumpkin needs two colors of contrasting fabric. One for the pumpkin and one for the top/lid. It can be any color and any design you want. A cotton calico works best but I have used wool and tweed from old coats before. The thinner the fabric the easier it is to gather up around the top and secure to the can.

Now at this point the size of the can you have chosen will determine the size of the circle to cut. You will have to lay it out and eye ball it. I have used a piece of old fabric before if you feel uncertain about this part. Just remember to allow plenty of room to add the polyfil stuffing to the inside of your circle.
I used a 12" dinner plate and then added a few more inches making it approximately a 15" circle.

Now take your needle and thread and make a gathering stitch around the edge of your fabric. You can either do this by hand or on a sewing machine.

Begin gathering the fabric up around the can and add the stuffing to fill the area inside between the can and the fabric.But do not add any to the bottom of the circle. You want your pumpkin container to be able to sit flat without tipping over.
Once you have your fabric gathered up evenly secure it around the outside edge of the can using a hot glue gun.

Now you want to take your felt and cut a approx. 2" or 3" strip to glue over the whole edge of the container. Be sure and glue it to the inside and outside of the pumpkin container.This protects you from any sharp edges of the can and gives the container a much smoother and more finished look.

Now you are ready to make the top to your pumpkin. I save left over containers so this was easy I just searched through my stash until I found a lid that is the size I want my top to be. I like a little over hang of the plastic lid to allow it to sit well on the top of the pumpkin. You can also use a firm piece of cardboard or a wooden circle for your lid. Improvise if necessary and use what you have for this step. It's going to be covered with fabric so as long as it's sturdy and won't bend most anything will work.
Under side of the container lid.

 Cut a circle from the contrasting fabric large enough to cover the top of the lid as well as the inside edge of the lid. This keeps any raw edges from showing.Be sure and glue the fabric down to the top of the lid, allowing the stem to be fastened down securely later. Since I am using a low temp glue gun it will not melt the plastic. Cut from your contrasting fabric 5 or 6 triangles to glue to the inside,allowing them to hang down over the container. The size of these triangles are completely up to you. It isn't necessary to add them at all, it's completely up to you. Add a circle of felt to the inside of the lid,either before or after you add the triangles.
Then to finish it off you will need a handle or stem for the top of the lid. I have used actual dried pumpkin or squash stems before. I have used small wooden thread spools. I have also used vintage wooden knobs before. Be as simple or as creative as you want at this point.

Since I am a felt artist I cut a simple 5" tapered shape and stitched the sides together. Then I added two more seams to the piece giving it more of a stem look. I stuffed the piece with polyfil and hand stitched a square of felt to the top to close it. I bent the stem over and stitched down to the side to give it a natural curved look. I added a few jagged cut pieces of felt and glued those down first before I glued the stem handle down.


Now at this point you can choose to line the inside of the can. I usually just add a plastic bag and fill it with some Halloween candy or nuts. You could put just about anything inside and present it as a gift. I have even added a felt jack-o-lantern face on the front before. Just be creative and have fun!

One container has made it to it's destination and two more are going in the mail tomorrow. Gifts for some very special ladies!!